
My Most Used Tools for Working with Clay!
Hello again, friends!
How are you all? If you’re here in Australia, I hope you’re keeping snug in this beautiful crisp weather! I’m loving the homely smells of cosy wood fires on the air, the colours of our changing landscape, the winter birds that are moving back in around the yard, and the under-blanket cuddles my two kitties are insisting on (with a boop to the face if I don’t open the doona quick enough). Bliss!
This week I thought I would share with you my most used tools for working with clay. I love to see this kind of thing from other creatives, and I thought you might too.
When I first started this gig, I was setting up on a budget. Plus, I try to live by the reduce, reuse, recycle mantra as much as possible. So some of my tools are improvised, and I want to point them out to you in particular, because you really don’t have to invest a lot of money into tools for clay - with a bit of imagination, so many everyday items will suffice!
Without further ado, here they are.
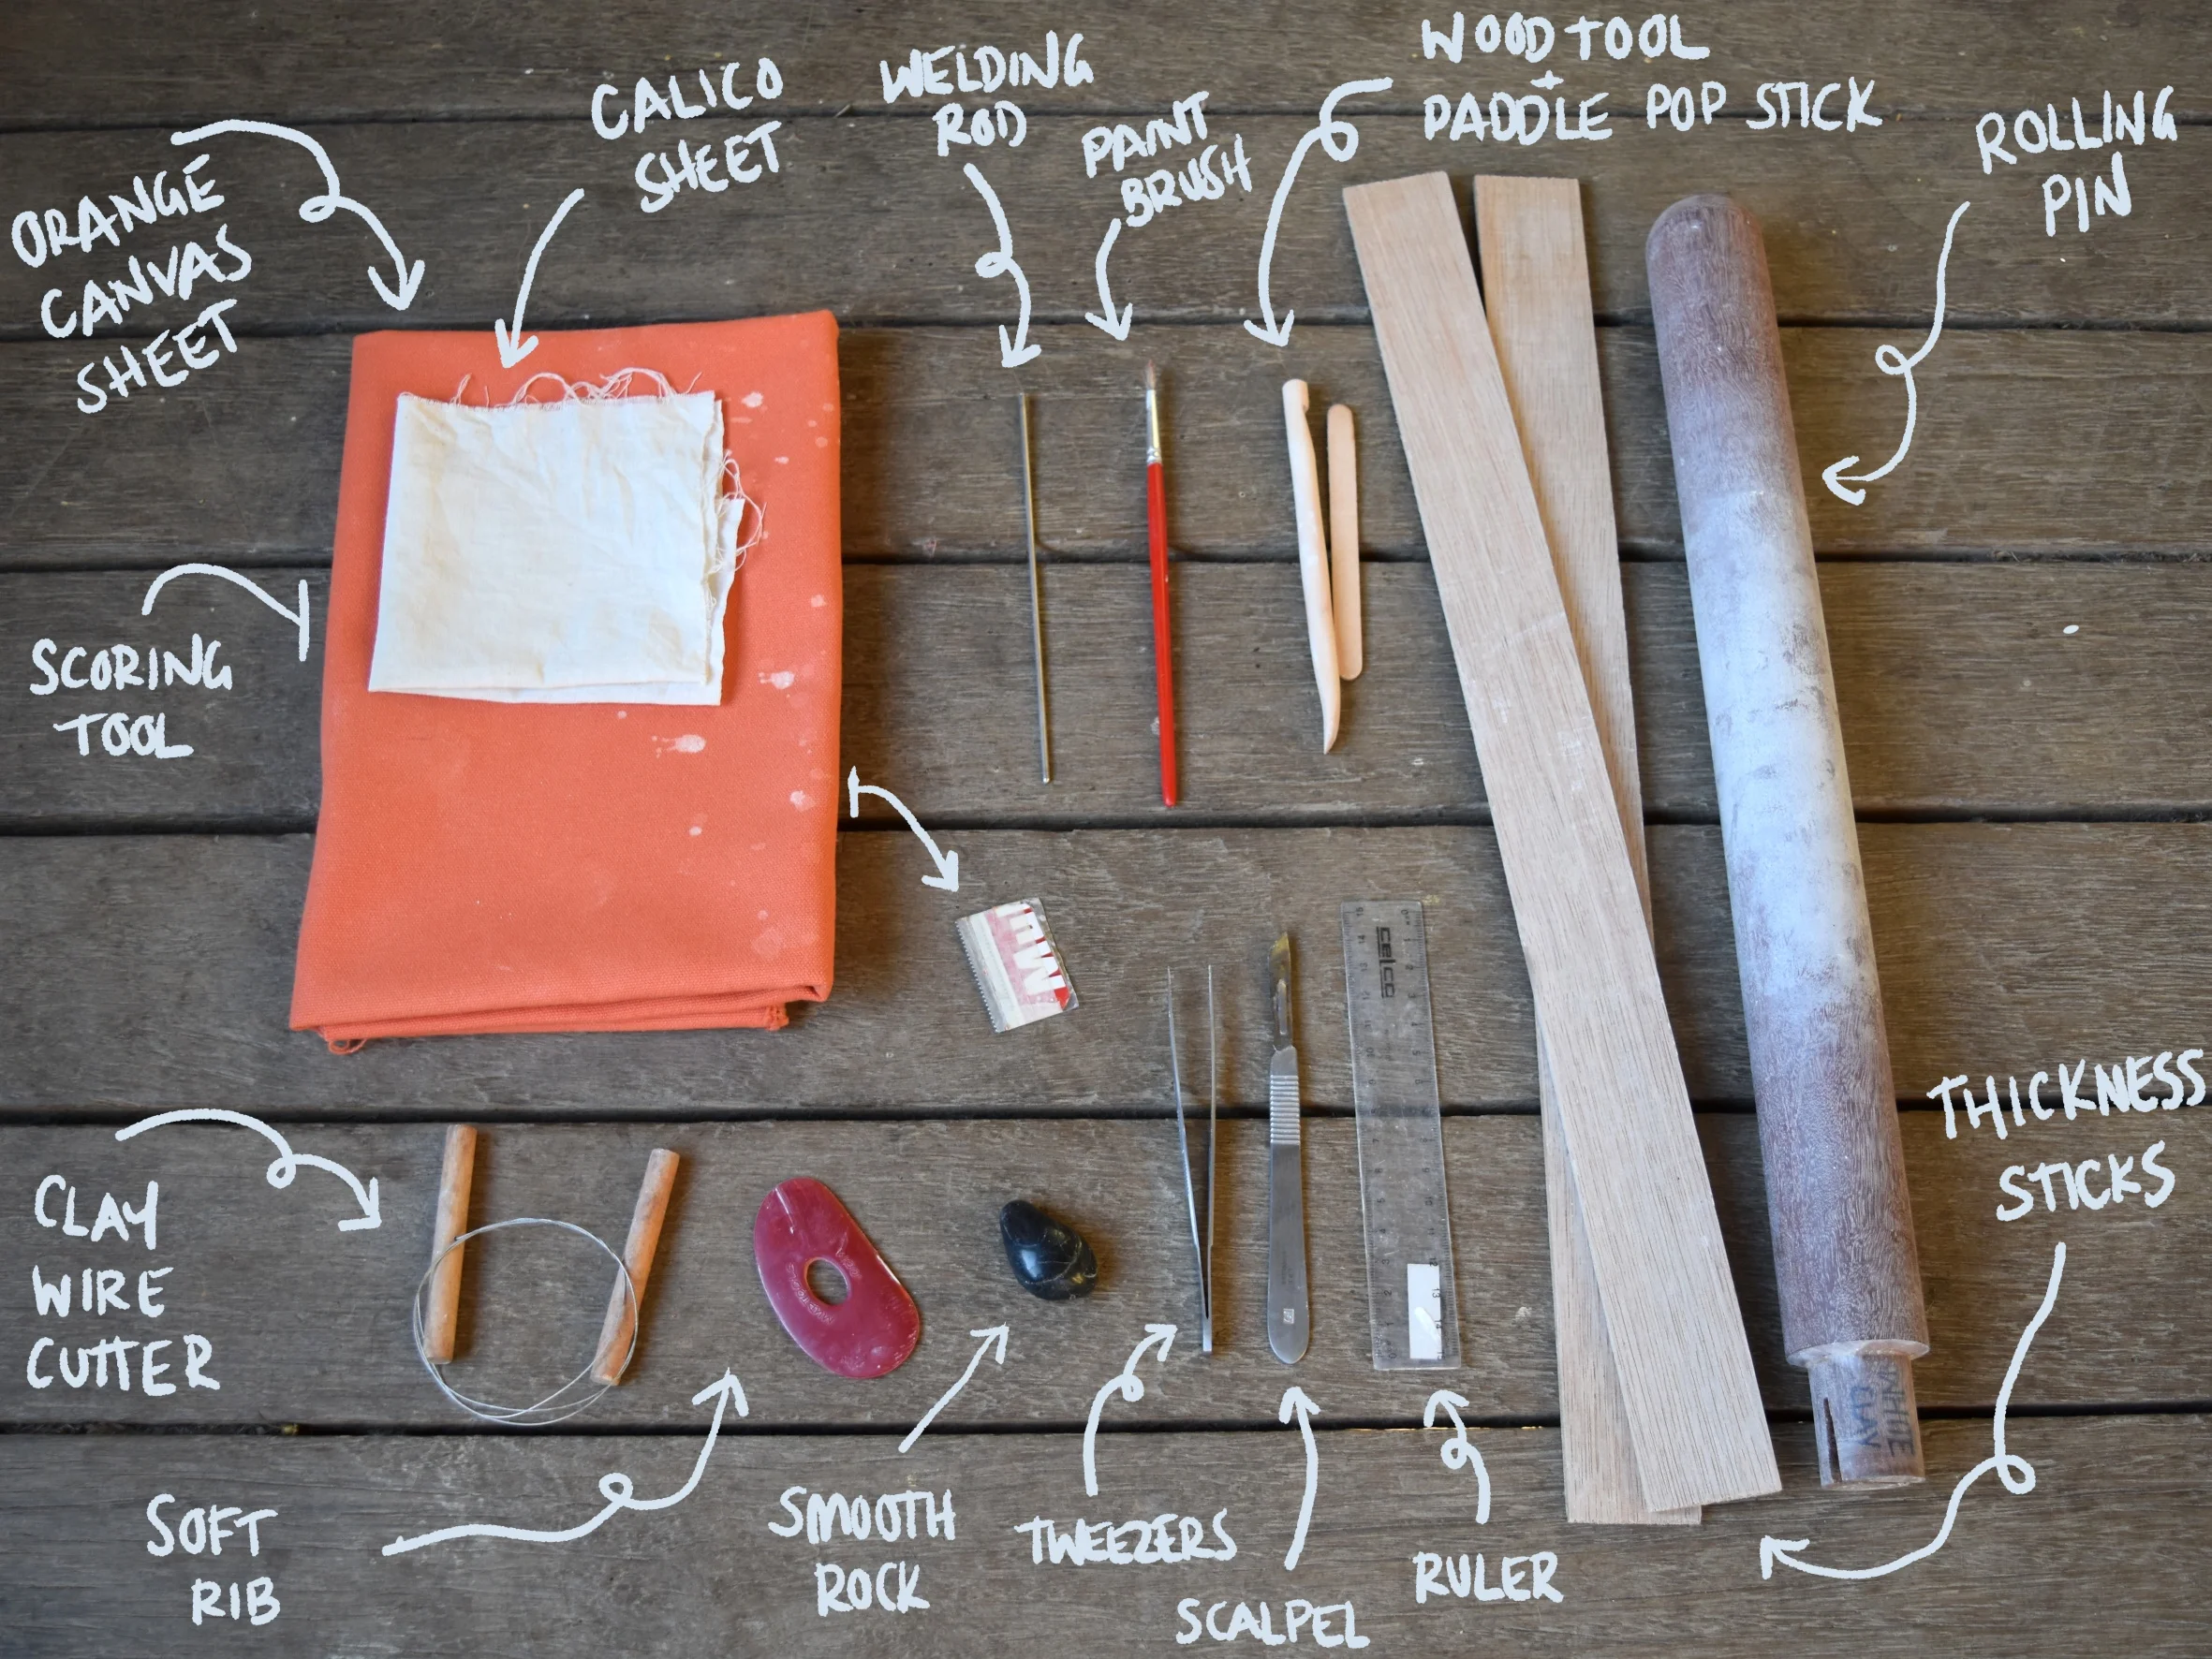
So what are they used for?
I’ll explain them in the general order of use.
clay cutting wire; this is for cutting manageable pieces of clay off the large block.
orange canvas and calico sheet; the canvas is for rolling my slabs out on, so the clay doesn’t stick to the table top and ruin all my efforts. The calico is for finer work so the rough stitch of the canvas doesn’t show on the piece.
rolling pin; this is actually a stool leg that I ‘borrowed’ from my Dad’s workshop (he’s a woodworker). I was using a regular kitchen rolling pin, but I like how wide of a slab I can roll with the stool leg better. Plus it’s hardwood, so the weight of it does some of the work for me haha.
thickness sticks; these help me to create an even and consistent thickness in all of my slabs. I have a few different sizes that I use, and all of them were foraged from either my woodwork project scraps or my Dad’s. I simply place a stick either side of my lump of clay, and they control how thin I can roll out the slab.
soft red ‘Mudtools’ rib; now this is my most expensive tool and something I think was well worth the money (though we’re still only talking about $12.85 here). It gets a lot of use throughout the whole forming process, but I’m putting it here as I think its most important job is compressing the slabs. Once a slab has been rolled out flat and even, this little beauty glides along the surface and compresses all the clay particles on both sides of the slab. This gives the slab strength and workability.
scalpel and ruler; these are for cutting shapes out of slabs ready to assemble into the end products you see. Many potters use a needle tool for this, but I prefer the cleaner cut of a scalpel. Mine is from my dissection kit from my lab research assistant days - quite a few of the tools in that have transferred over into my studio! The ruler is most useful for cutting bevelled edges on slabs, but I’ll talk more about that in a future post.
scoring tool; this is another improvised tool. It’s a section of a cutter from the box of a roll of baking paper. I just wound some tape around the handle to strengthen it, and this one has served me well for many months now.
stiff bristled paint brush; this is for applying clay slip or vinegar water to the joins of slabs.
paddlepop stick with sanded end, wood tool and smooth rock; all of these are used for compressing and smoothing out joins in slabs, like in the base of a mug. I started out with only the paddlepop stick so you can definitely make do with just that.
tweezers and welding rod; the tweezers are for lifting leaves and wildflowers out of the clay, and the welding rod is for simple decorating and creating holes in things like my mushroom bell stipes and beads, etc.
So there you have it. These are my most essential tools for the forming part of working with clay. All of these live right on my workbench and are used all the time.
What tools have you improvised with and what are your essentials?
While you’re here - don’t forget to sign up for my blog and monthly Newsletter at the bottom of the page! You’ll get access to exclusive content, giveaways, competitions and first dibs on certain product restocks.
Keep creating, lovely humans.
Rhiannon is an Australian ceramic artist based on the Mid North Coast of NSW. She makes small batch decorative and functional pottery art in her home studio, drawing inspiration from the beauty of the bushland around her.